Hello there! As promised I am going to share my personal binding techniques with you here at OneLittlePooh.
Now that you’ve finished quilting, it’s time to bind the quilt by sewing continuous binding strips around its edges. Don’t be scared, even if you’ve tried it before and had a bad experience. Go slow and hopefully I can show you how to bind a quilt. Simple and sweet.
On measuring:
I’m not ashamed to say that me and math aren’t friends. Now that you know that, time to figure out how much fabric you need for your binding…. let’s keep it simple.
If you have a mini quilt, just measure all four sides with your tape measure. I’m sure you have a cute one.
My mini quilt was 14″ x 14″ and after I measure all four sides, that equaled out to 56″. No multiplying or figuring out things….just measure the sides. Easy right?
If you have a larger quilt, measure down one side. Side measures 72″? Ok you know there are 2 sides, so pull out your iphone calculators and tap in 72+72 = 144. Thank you iphone calculator. Now measure across the top of your quilt. 60″? Again, you know there is a top and a bottom so back to the calculator 60+60 = 120. If you add the first amount with your second amount, that is the total number of inches around the edge of your quilt. 264″ for the big one.
The word multiply makes me nervous in case you were wondering why I didn’t just say to multiply 72 x 2 for the side measurement. You can surely do that too.
Cutting the strips:
We will cut some strips of fabric 2 1/2″ wide. That’s pretty standard.
How many do you cut? Good question.
We all know that the width of most fabric is about 44 inches, so I like to use a nice round number and pretend it’s only 40.
My mini cherry quilt is 56″ around the outside edge. Now we want to divide the number of inches around the outside edge of our quilt by 40″ the WOF.
After dividing my mini cherry inches 56 by 40 i got 1.4 so I will cut 2 strips.
POINTER: Don’t like numbers at all? Lay your quilt on the floor, cut a few of your strips and lay them next to the quilt. Keep cutting another strip until you have enough to go all the way around plus a few extra inches. It will be our little secret.
Connecting your strips:
We want all of the strips we cut to be attached together to form one continuous piece.
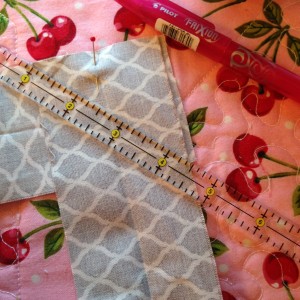
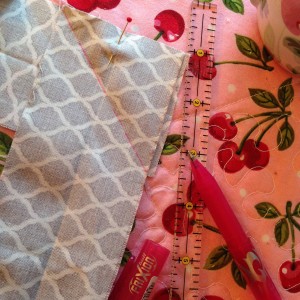
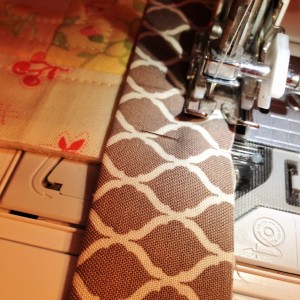
With right sides together lay one strip on top of the other. Using a ruler, draw a diagonal line from the top left corner down to the bottom right. That will be your sewing line.
After sewing all of your strips together, trim off the little triangle about 1/4″ from your sewing line.
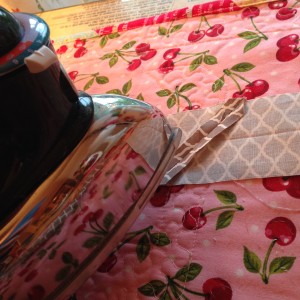
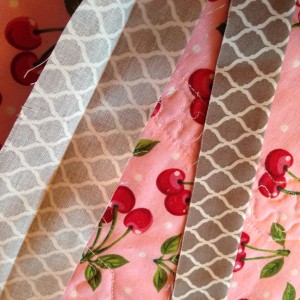
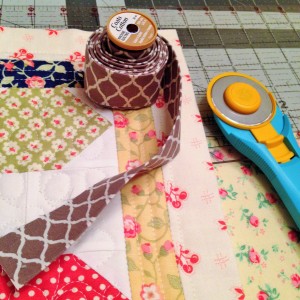
Press the seams open. That will help your binding strip lay flatter. Now you can press the entire length of your binding strip in half. Rolling your strip onto an old spool will help keep it all together until you are ready to use it.
Let’s attach your binding:
After you have your lengths stitched together and pressed in half ….. it’s time to start attaching it to your quilt. Attach with 1/4″ seam.
Pointer: Using a walking foot for this part will make it easier for your machine to drive over your 3 layers of quilt plus the binding strip.
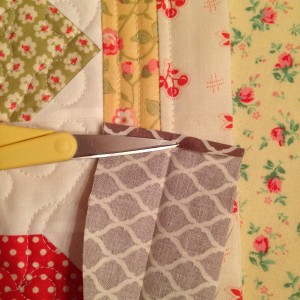 Open your binding and press down a little 1/4″ flap. This will help make your end connection barely noticeable.
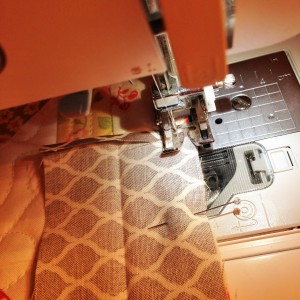
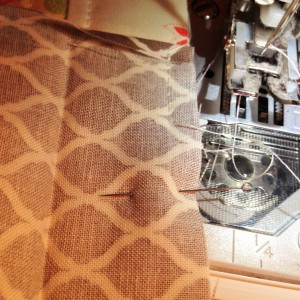
You only need to sew down about 1 inch. Just enough to attach your binding so it doesn’t scooch around. I suppose I probably should have used a darker thread so you could actually see the 1 inch length. Don’t hate me.
Fold your binding back over and start stitching again about 2 inches from the beginning. You want to leave that space so you can tuck your fabric under at the end.
Pointer: Playing the song “moving right along” from the Muppet Movie will make this part really really fun!
Stitch down to the corner stopping 1/4″ from the end. I usually mark the spot with a pin. Back stitch and remove from machine.
Some people prefer to leave the thread attached when they fold the corner. If that’s what you are comfortable with, then that’s what you should do. I remove mine from the machine so i can make the fold without anything getting in my way. Again, personal preference.
The corners:
Go have a quick snack and then come back and I will show you how easy this really is.
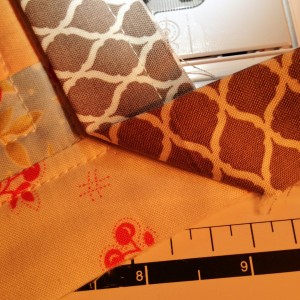
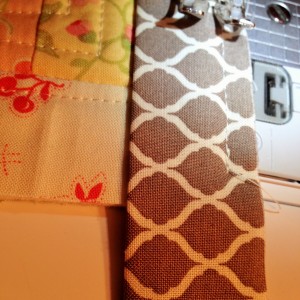
Pic 1: Fold your strip up and away from the quilt. Your 1/4″ stitch will help hold it in place while you make the fold.
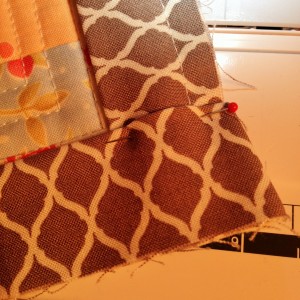
Pic 2: You can pin diagonal to hold your fabric in place while you lay your strip back down towards the quilt. You don’t have to but it helps hold it in place.
Pic #1: This is what it will look like when you are folding it back down towards the quilt if you don’t use that diagonal pin.
Pic #2: Pin in place after you double check to make sure the edge of your binding fabric is lined up with the edge of your quilt.
Some people refer to these as mitered corners. A mitered corner means the beveling of the two parts to be joined at a 45 degree angle to form a corner. Could be fabric, could be wood…. depends on what you are making.
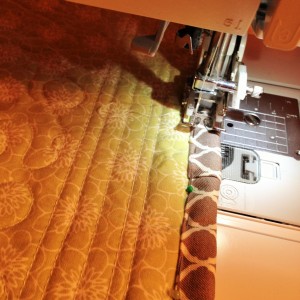
Pic #1: Start stitching at the fabric line. Some like to start stitching 1/4″ in, but I seem to get a better corner this way.
Pic #2: That is where you start stitching after making the folded corner.
Random fact: I wrote this tutorial at night while the littles were sleeping so I didn’t need to keep stopping for cheez it breaks.
The tuck {attaching the end pieces}:
You will most likely have extra binding when you get to the end. I like to trim mine down, so I can tuck in about an inch.
There are many many wonderful techniques out there and I have tried a lot of them. But trying to figure out how to sew the end pieces together was too much for me & cutting it on a diagonal left it a little bulky. Just this process alone could keep someone from making an amazing quilt…. because they don’t know how to finish it.
Don’t let that happen!
Let’s look one more time……
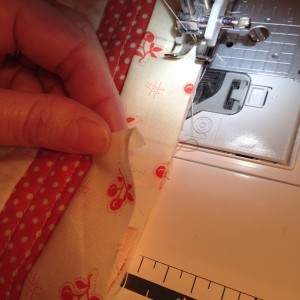
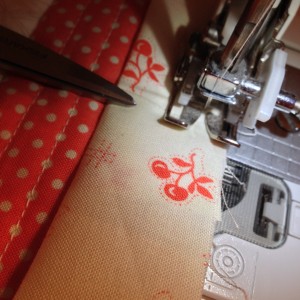
Tuck your one inch of fabric under the flap and continue on with your 1/4″ seam to stitch it down the rest of the way.
Look how nicely they fit together. And all you had to do was tuck some fabric under. Who knew.
The homestretch:
You are in the homestretch. The binding is now attached to the front. Let’s flip this mini over and finish up so you can show off your quilt on Instagram and tell all your friends how you learned to attach the quilt binding. YAY! #proudmoment
Memo: I used pictures from 2 different quilts to share this tutorial. Your eyes are not playing tricks on you.
Let’s start pinning:
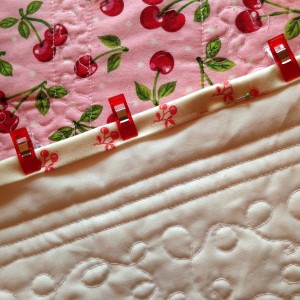
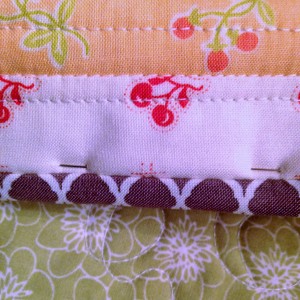
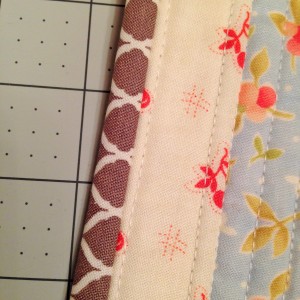
Pic #1: Fold your bias over and pin down or use clover clips. Either way works great.
Pic #2: I usually like to flip the quilt over to take a peek at where the pins are landing. That will eventually be where your seam line is.
Because of the way you’ve sewn the binding to your quilt in the beginning, the corners will fall into place more easily. As you get to the corner, it should look like this. Fold the binding over just like an eensy weensy envelope.
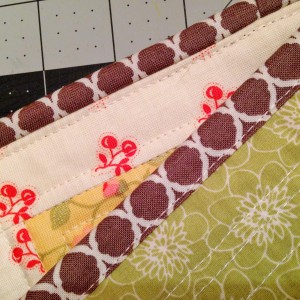
Sew along the edge of the bias, pulling out the pins as you go. If you don’t…. you will sew through the bias on the other side and that’s not as pretty.
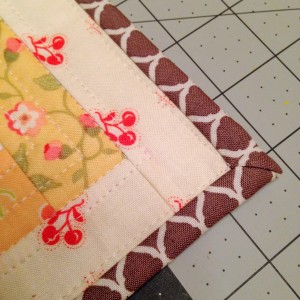
See how easy that was? Now go give it a try and come back to let me know how it went. I know you can do it!!!!
We all make mistakes and that’s okay. You would probably spit out your diet coke if you saw half of the things I mess up. I’ve even run the sewing machine needle right through my own finger. What????? Go get your seam ripper & start over, laugh at yourself….. but don’t give up. Nothing needs to be perfect, it’s homemade sweetness.
She works with her hands in delight. ~ Proverbs 31:13



Thanks for the thorough tutorial! (I love your math aversion!) I will definitely try your technique next time.
Linda says
I love this and cannot wait to try it. One questions when you sew your binding strips together do you sew it with straight edges are do you sew them where the seam is at a angle.
When I posted this I just knew someone would ask that. hehe
I sew them together at an angle. Later today I will post an extra picture adding that part in.
Linda says
Thank you, I will look back later to see the picture.
Absolutely wonderful job explaining this! I just finished a quilted pot holder that I had found online to make, and followed their tutorial on binding. Yours had some information that they did not which is very helpful. I can not tell you how happy I am that I am learning to do this, and I have people like you to thank for sharing! So thank you!
Thank you Tina! I am a visual learner so your instructions were perfect. I actually have a mini quilt to bind for a swap so your tutorial certainly came in handy.
Thank you so much for sharing this. For me, the part where the binding ends meet is the only stressful part of the whole quilt making process. When you said this alone could keep someone from making an amazing quilt, you nailed it for me. I cannot wait to try your method : )
Hi and thanks for your tutorial, I have tried it and I really like your way of actally every step as bias strip sewing together, starting inch, corner start fom edge and finnish overlap - this will be my roll modell of binding from now Though I didn’t manage the final stitch binding that will make a visual quilt stitch on the front so I will probably stay with hand binding (which I love to do) but I would really like to learn, could it be easier with a walking foot? Please give me some advice;)
Regards Hellen
Oh yes I always use a walking foot for the binding. I think I wrote that on the tutorial.
Hi - Thanks for your quick answer. Yes of course I saw that you metioned the walking foot so I guess I have to head of to the sewing maschin shop and by one and then learn somethig new (always fun:). Regards Hellen
Anita says
Great tutorial! Perfect timing too! I used your tutorial today. I loved the “end joining”.
Mary Ann says
I love this, it’s very easy to follow & I need easy! I also like the verse you ended it with!!